 SCM Workbench - User Guide SCM Workbench - User Guide
User guide for the Source Control Mangement (SCM) Workbench.
User Guide Sections
Table of Contents
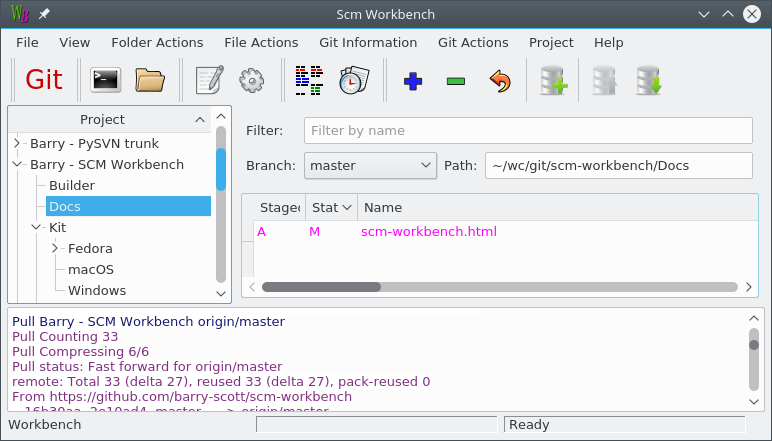
The SCM Workbench window is split into three main areas. The top area is like a file and folder explorer.
Use the left hand tree control to change between projects and folders and use the right hand list control to work with files. You can change the information shown using the View menu.
The bottom panel is used to show messages. In the example below the result of a git pull.
Use the toolbar to access frequently used commands.
The status bar will show the progress of long running operations like push and checkin commands.
The filename filter is used to focus in on a few files.

Type a part of the name into the text box to show only files that contain what you type in the name.
Click the X icon to clear the filter string and show all files.
All of the menu items in SCM Workbench are described below. Click on the menu item to scroll to its description.
The menus and toolbars are changed to reflect the needs of the selected project.
| File | View | Folder Actions | File Actions | Project | Help |

Enter the default folder to create new projects under.
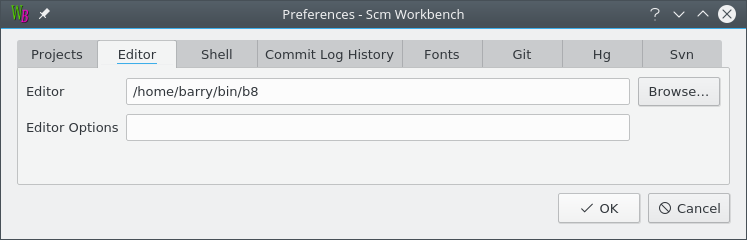
Enter the path to the editor program you want to use in the "Editor" text box. The Browse button pops up a file picker dialog to help locate the editor program.
Any command line arguments can be entered in the "Editor Arguments" text box.
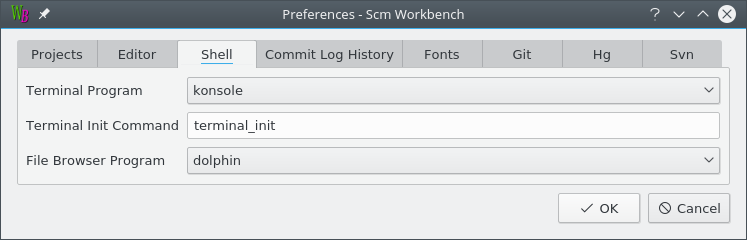
Choose the "Terminal Program" you wish to use for the Command Shell command. The available choices depend on your operating system:
The optional "Terminal Init Command" will be run each time a new Command Shell is created. For Unix and macOS the terminal init command it sourced into the shell, which allow environment variables to be set.
Choose the "File Browser Program" you wish to use for the File Browser command. The available choices depend on your operating system:
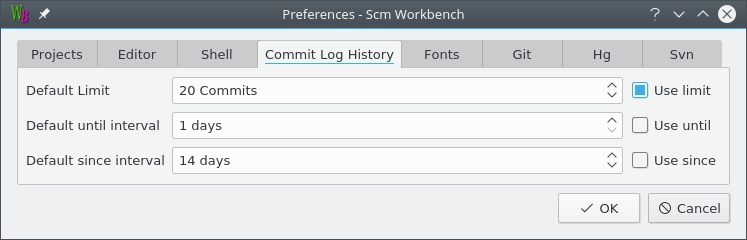
The "Commit History" and "Log History" commands will use the values you set in this preference panel as the defaults.
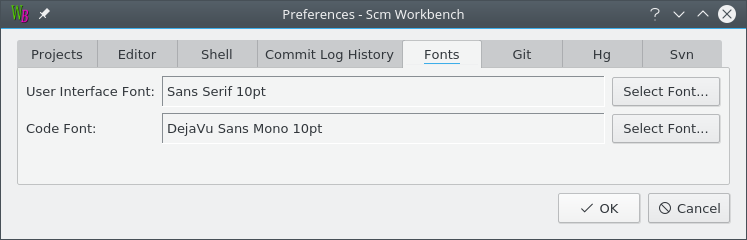
Choose the fonts that you wish SCM Workbench to use.
The Code Font is used to show differences and commit messages all other text uses the User Interface font.
The Code Font must be a mono-spaced font.
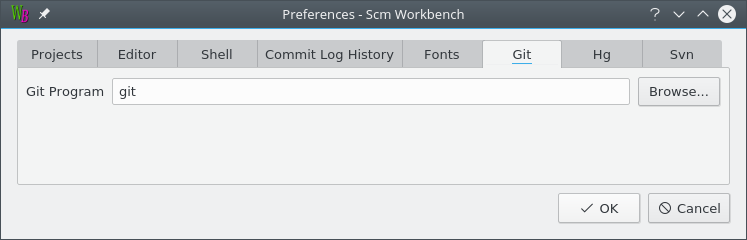
Choose the "git" program that you wish to use. The Browse button pops up a file picker dialog to help locate the git program.
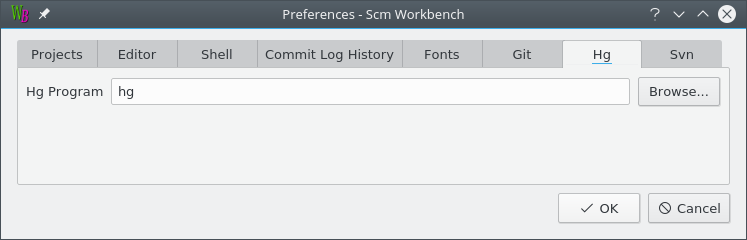
Choose the "hg" program that you wish to use. The Browse button pops up a file picker dialog to help locate the hg program.
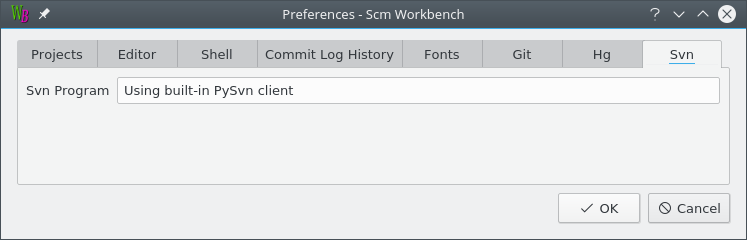
There are no Subversion specific preferences at this time.
All the messages that you see in the main windows are also write to a log file. This menu allows quick access to that log file.
Quit SCM Workbench. All open SCM Workbench windows will be closed.
Clear the log messages windows.
Show Controlled and Changed files that are part of the project in the list panel.
Show Controlled and Not Changed files that are part of the project in the list panel.
Show Uncontrolled files that are not part of the project in the list panel.
Show Ignored files, files that the project normally ignores, in the list panel. Ignored files are configured in the project specific config file: .gitignore, .hgignore and .svn/config.
Use the textual unified diff format when presenting differences.
Use the graphical side-by-side diff format when presenting differences.
Note: This presentation is not used when showing the differences for a folder of files, unified diff is used.
Use the meld program to show differences.
Note: Menu is only shown if the meld program is installed. It is not included with SCM Workbench.
Start a command shell which has the selected folder as its current working directory.
The Shell Preferences allow you to customise how the Command Shell command works.
Start a file browser at the selected folder.
The Shell Preferences allow you to customise how the File Browser command works.
Edit the selected file using the text editor configured in the Editor Preferences.
Open the selected file using the standard operating system method.
For example open for an HTML file will open it in your web browser.
The Add Project wizard guides you through the step necessary to add a project to SCM Workbench.
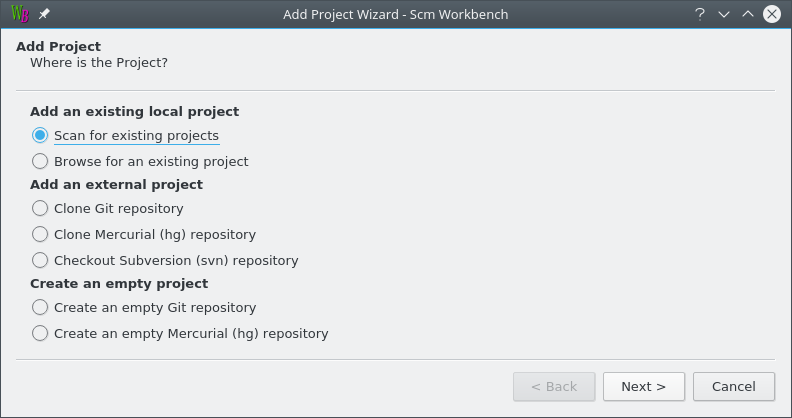
Choose how you wish to add a project.
Note: The Git and Mercurial options will only appear it SCM WOrkbench found the git and hg commands.
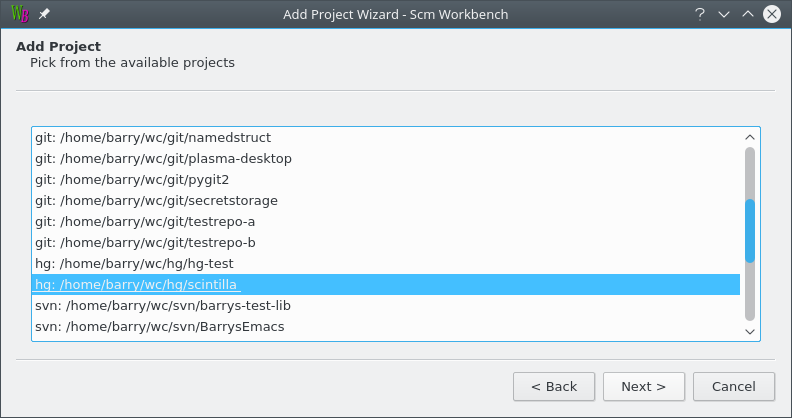
Workbench will start scanning from your home folder ($HOME on macOS and Unix, %USERPROFILE% on Windows) looking for projects.
The list only contains projects that have not been already added to Workbench.
Each entry in the list is the folder on disk prefixed with the type of SCM that supported it.
Once you see the project you want to add highlight it and click Next which will take you to the wizard page to set the project's name. You do not have to wait for the scan to complete.
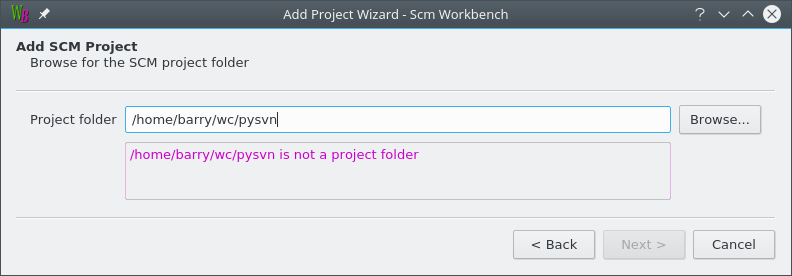
Enter the path to the project that you wish to add. The Browse button pops up a file picker dialog to help locate the project.
If there is a problem with the path you will see feedback on the wizard page.
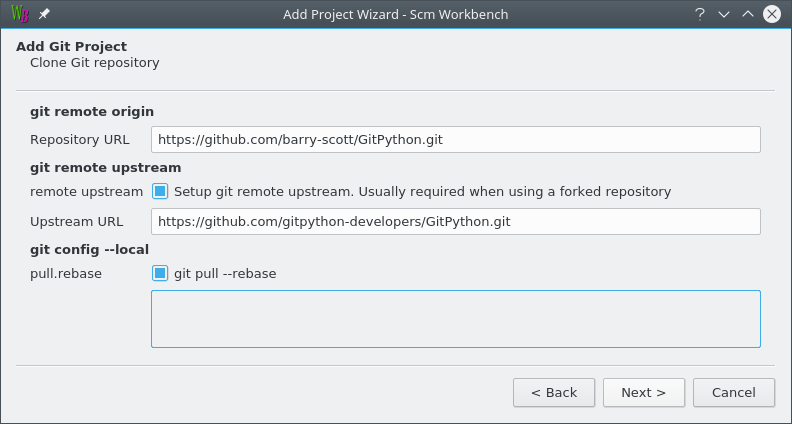
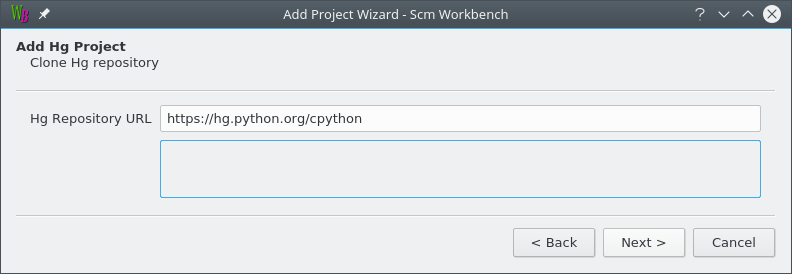
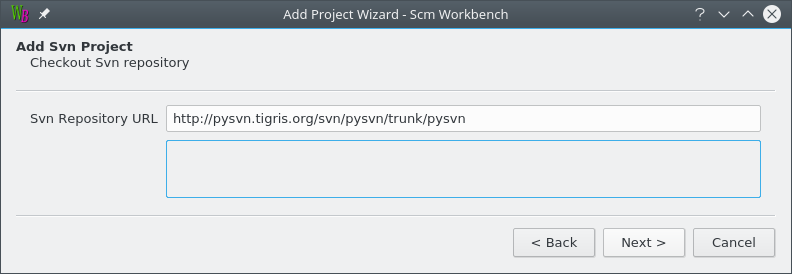
Enter the URL of the Subversion repository. The URL is typically publish by the Subversion repository administrators.
You may be prompted for any username and password required to access the repository.
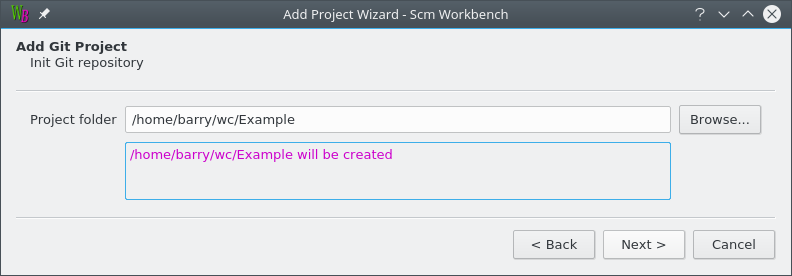
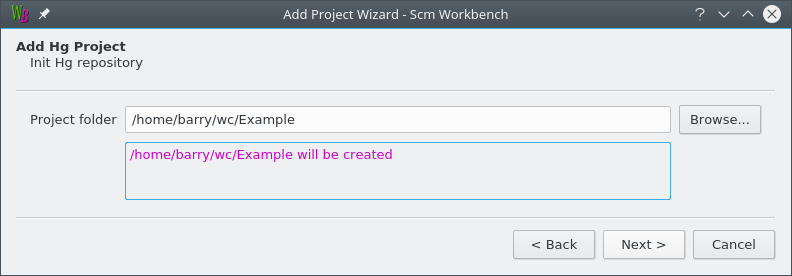
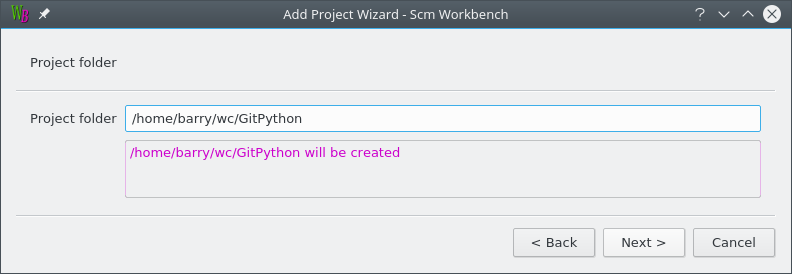
Enter the path where you want Workbench to store the project files. The Browse button pops up a file picker dialog to help choose the location.
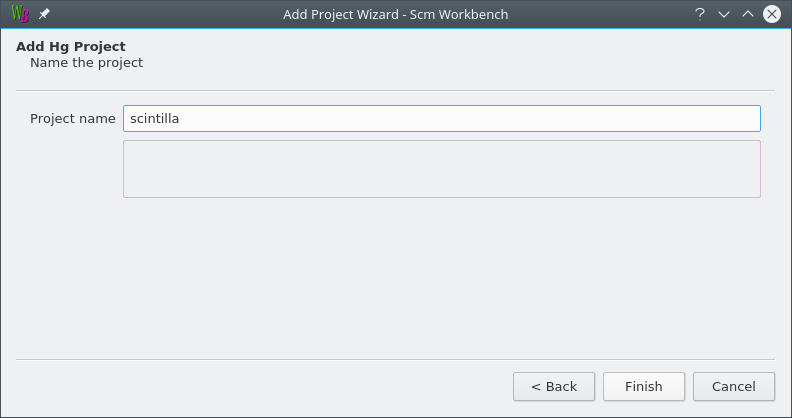
Enter the name that you want Workbench to use for this project.
Click Finish to complete adding the project.
The details of project settings are described in in SCM specific documentation:
Pop up a dialog to confirm the deletion of the selected project.
This does not delete the project files, it only removes the project from SCM workbench.
Open this user guide in the systems web browser.
Pop up a dialog that shows the version of SCM Workbench, Git, Hg, PySVN, PyQt and Python used.
SCM Workbench depends on you installing optional software to support some features.
SCM Workbench will search for the optional software when it starts up. If You have install git or hg and SCM Workbench does not find software you can configure the location in the Preferences…
When SCM Workbench starts up it reports the location of the optional software it found.
Starting Scm Workbench
Reading preferences
Hg using program /usr/bin/hg
Git using program /usr/bin/git
More details, like version information, is shown in the Help » About… menu.
Subversion is always supported by the builtin pysvn code.
Git support requires that you install the git command for your operating system.
Mercurial support that you install the hg command for your operating system.